Painting a Rifle
Although there are many people that cringe at the thought of painting their precious rifle, it is almost as important and camouflaging yourself. Basic rules of camo apply here, as the main goals will be to break up the hard lines from the rifle and to utilize the proper color and pattern scheme to fit in with your environment.
For those of you that just cant bring yourselves to apply paint on your weapon, there are various other methods discussed on this site that will help you break up your weapons outline without needing to paint it.
Supplies:
½ inch masking tape
1 can of krylon camo or fusion (for synthetic stocks) for each color you decide to use
Exacto knife
Rubbing alcohol
Pieces of plantlife from your desired environment (or similar)
Lets get started.
#1
First thing you need to do is wipe the weapon clean of any oils, solvents, or dust. Use gloves when doing this so as to avoid getting your skin oils on the weapon after you have cleaned it. I use simple rubbing alcohol to accomplish this with most of my weapons. If you are using a semi that has seen a lot of abuse, you might want to break it down and clean it more thoroughly. For most purposes however, a simple yet thorough wipe down with alcohol will do.
#2
Next thing to do is tape off all the areas you dont want paint to hit. Most people prefer to tape off moving parts such as the focus ring and scope turrets on scopes. You will also want to tape off the action and the crown. If you would prefer, an ear plug rolled up and stuck inside the end of the barrel will do well to avoid paint from getting into the crown. Use the exacto knife to cut the tape to a better and more attractive fit, matching the lines on the weapon. I usually dont do this, but if youre a perfectionist you will want to do this.
Dont worry too much if some blow over gets onto your bolt or various other places you wouldnt want it. If it is slight blow over, it probably wont cause a problem. If you dont want it there at all, simple nail polish remover is what i use to remove the unwanted spray with relative ease, just be sure to use an applicator that doesnt leave fibers behind on the weapon.
#3

The next step will be to apply your basecoat. This will be the underlying color for the entire process, so be sure to match it to your desired surroundings and apply it consistently across the weapon. If you are doing one side at a time as is the case in these illustrations, be sure to allow your weapon to dry for about an hour (if you use Krylon) prior to flipping the weapon and painting the other side. Know your weapon, and apply this coat liberally while not forcing the paint into areas which you wouldnt want painted.
#4
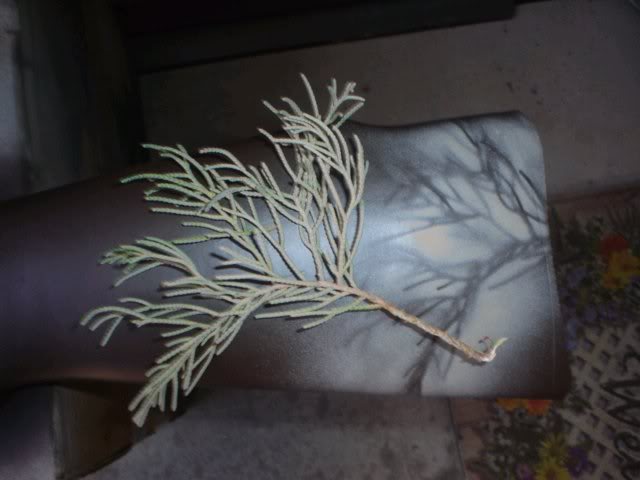
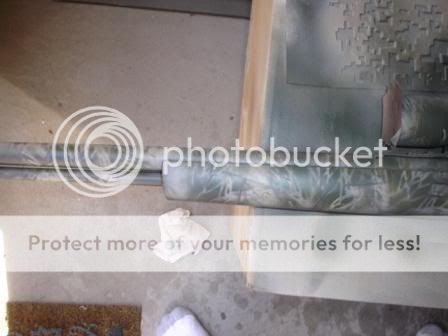
Next you will start to layer your pattern. Use pieces of plantlife from your desired environment (Ive used cedar here) to create this pattern. Try to think in the negative. In this first layer of pattern, the pattern itself will be the color of your basecoat, and the color you are spraying will become the base for the next layer. I went from light to dark with my pattern here, but the decision to do this or the opposite will depend on the color scheme you are after. Experimentation will be your best tool here. Remember, if you dont like the way the patter is going, simply start over. Now that you have a good idea as to how to start (which is the tough part, once you get going it gets easier), simply place the plant on (or over, depending on your pattern preference) your weapon and lightly spray your paint evenly across it. I used a vertical spray for this pattern, holding the paint approximately 5 inches from the cedar.
#5, 6, 7, etc

Next, just continue to add layers as you desire. The further you get into the job, the better you will be able to see a pattern and decide which direction you would like to go from there. Remember, experiment and have fun with it, you cant mess it up! I usually redo my pattern a few times. Just paint right over it, it wont hurt a thing.
Here are some other designs I have created out of shear boredom!


If you would prefer a tiger stripe pattern, you can use this template or create your own. Simply print out the picture, and cut out the stripes.
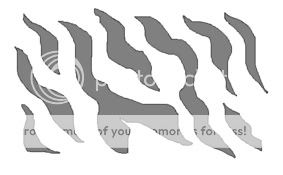
Or you can make your own unique pattern. Tiger striping is one of the easiest methods of break-up there is.
#1

Follow steps 1 through 3 from the previous painting method. Your basecoat will be more pronounced here, so be sure to match it to your environment well.
#2

Once the basecoat is dry, apply your first layer of pattern. Simply place the cutout onto the weapon, and use even and thorough vertical sprays, then move the cut out down the rifle. It should look like this after the first layer. You can already see the breakup of the hard lines on the weapon.
#3

Now add your next layer. At this point, you can either leave it as it is or continue to layer as you please.
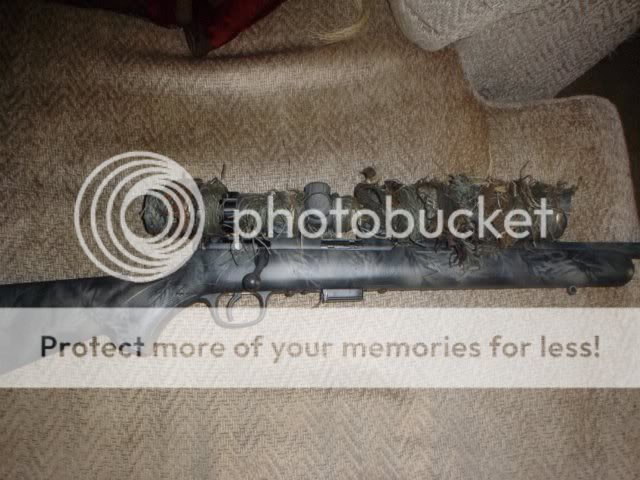
This is how this weapon looks with a similar background to the base coat color: